Showing posts with label beauty. Show all posts

let.the.nails.speak.


I'm never been big on nail art but came across these and thought they were so much fun! Would totally
try this out if I had the time and mostly importantly patience.

Source: WAH NAILS & OMGnails

Beauty post


After getting so many questions about make-up and skin routines, I’ve put together a big beauty post. 
A step by step make-up tutorial is on it’s way, this is a general post.


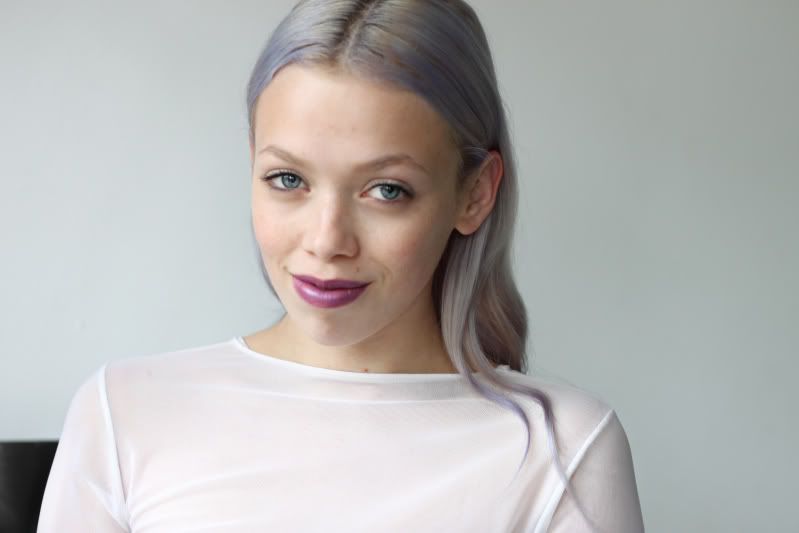
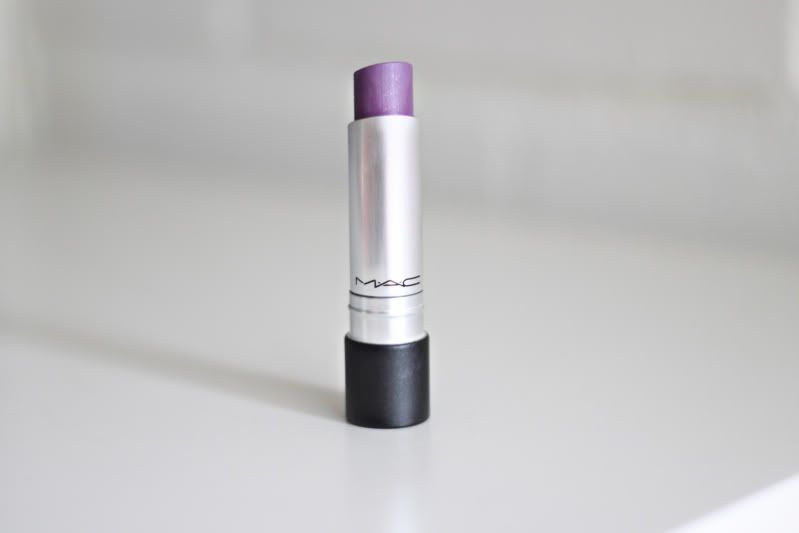
1) Creating a flawless face. I don’t have a lot of skin issues, but when I’m tired it immediately shows in my have (enter dark circles and pale complexion). So I apply YSL Touche Eclat under my eyes followed by a bit of MAC foundation in NC15 - it's the the lightest color they have. Next up: subtly applying bronzer from my cheeks out and some pink blush on the apples of my cheeks. A little highlighter on the cheekbones can also make you look fresh and fruity.

2) Eyes, eyes, eyes. I just eyeshadow base, black eyeliner for a subtle wing and black eyeshadow along the lash line that I blend with taupe shimmery eyeshadow on the eyelid. More on this in the tutorial – it’s super easy!


3) Creams and skin care
. Having good (looking) skin isn’t always easy, but it can make a huge difference in how you look and feel. Along the years I’ve found out what works best for my dehydrated skin. Secret ingredients are: 8 hour cream by Elizabeth Arden for dry spots and chapped lips, Vichy moisturizer for day and Embryolisse for night. Of course next to cream there are other - more intense - ways of hydrating or rejuvenating your skin that I haven’t really tried out yet but that I’m always interested in, for example with light. There’s a new laser light device that you can test at Douglas at the moment and that you can actually use at home for laser skin care. It’s called the Philips ReAura. How this works is that you just apply a gel, use the laser light to activate new cells (deep inside your skin) and lastly hydrate as you would normally do. It gives a smoother structure and reduces any pigment spots or fine lines on your face. Did you ever try this?

BEAUTY | Winter Hair Care

Photobucket

Photobucket

For the last couple of months my poor hair has been mistreated, abused by the blowdryer and nearly bleached to death. But since it´s impossible in winter to have a good hairday anyway, I am going to try to make it up with my hair. Give it a break for a couple of months and give it some time to recuperate so that it will be nice and healthy in spring.

Measures I´ll be taking:
Braiding it or putting it in a (doughnut)bun will avoid the hair from blowing all over the place and getting tangled up. This will reduce chances to getting new split ends and there is also no heat required for these hairdo's. Keeping it extra moisturized is also important as indoor heating dries out hair causing more split ends. I do this with a tiny bit of regular olive oil after washing my hair, which is only twice a week. On a daily basis I spray a bit of oil nutritive wonder serum spray by Schwarzkopf. And lastly I'm going to lay off the peroxide, this will give the new hair a chance to grow and give my scalp a break. I do not mind the dark growth at the root at all, I actually like a bit of a neglected look.

inky.ombre.nails.


Backstage at Parkmoonchoo Fall 2011 show

How amazing is this manicure? Knew I had to try it out when I laid my eyes on it. Here's how to achieve it!

You'll need three nail polishes: an opaque nude color, a super-dark hue and a clear topcoat.

1. Start by painting nails with the pale hue, and let dry completely.
2. Next, paint a very thick layer of clear topcoat over the nude color.
3. While the topcoat is still wet (and working one nail at a time) use short strokes
and a heavily-loaded brush to dab the dark color just along the tip of the nail.
It's all about creating a painterly effect here, so be sure to lay it on thick and
don't worry about being too precise; the two polishes should run together to
create a marbled effect.

4. Let nails dry completely, clean up any mistakes around the nail with nail polish remover,
and finish with another layer of clear topcoat.

BEAUTY | Halloween Nails

Photobucket

A manicure for all the zombies tonight.
Very easy to do with a thin nail art brush.

VIDEO | Slicked Back Hair


This I-just-stepped-out-of-a-swimming pool-hairdo isn't anything new. Every season there is at least one designer that chooses slicked back hair for his models, we've seen it any other editorial, on the red carpet and on a 14 year old Kate Moss in the 1990s. Though it seems that it has never made it to the streets. I've never seen anyone wear a ton of gel in their hair like this on their way to work. The reason might be that if you do it too often your hair will probably start to fall out at the front and you'll end up with a mullet. But disregarding all that I thought I'd give it a try; it involved lots of combing and lots, lots of gel but the result was well worth it. I will defenitely be doing this slick coif more often.

BEAUTY | MAC Longwear Lipcreme

Photobucket

Photobucket

This lipstick has all the qualities I missed in other lipsticks. (No I´m not getting payed to write this) Mac's longwear lipcreme is matte, doesn't bleed, it lasts through a lunch and it comes in this amazing purple tone. If I must say something negative to make this review still appear somewhat journalistic then I'd say that the first half hour after applying it feels like glue on your lips. It is so sticky that it gave me some flashbacks to my lipgloss days.

BEAUTY | Subtle Noir French Manicure & Chain Ring

Photobucket

A subtle version of a french manicure in black. Instead of the usual nude and white, I used black nailpolish from Rimmel and a matte topcoat from Essie. ´A delicate silver chain necklace is wrapped around my finger and is worn as a ring.

BEAUTY | The Metal Nails

Photobucket

I've gotten a massive amount of questions on my nails of the previous post. It is not a nail polish but a nail foil. Kind of like stickers for your nails. It was invented by a company named Minx who put in on the market back in 2007. Now you can get your nails foiled at lots of nail salons and buy nail foil at every other make up store if you want to do it yourself. I recommend the ones from Sephora, which I always use for my toenails. Unlike nailpolish it doesn't chip off, if no air get's underneath the sticky foil you can wear them as long as you want to. Foiling the nails on your hands is trickyer, a friend of mine -thanks Michelle!- who is a nail stylist and recently started working with nail Minx did mine.

Curled up


Started curling my hair again. It's finally long enough after my last catastrophic haircut made it too short I only liked it somewhat straight.

I posted this quick pic on
my Twitter and got a bunch of questions on how I did it. I'll try to do some sort of picture tutorial because my explanation isn't that clear but here it goes:

1) Dry your hair completely and
use a heat protecting spray

2) Divide all your hair in to three parts.
One small section on the top and two bigger, equal sized parts in the middle and bottom of your head. I use the top of my ears as an indicator of where to separate the middle from the bottom bart. Twist all your hair except the bottom layer in a bun so it’s out the way.

3) We start with the bottom layer.
Divide that in to a left side and a right side.

4) Begin curling with one side – I do left first.
Divide that side in pieces of hair that are about 4 centimeters wide - yes; most of the work is in parting hair ;) - and start curling those in a motion going away from your face. You hold the iron horizontally and then roll the iron in a motion going away from your face, starting at the tip of your hair.

5) Hold the iron for a few seconds and carefully roll it out. Immediately spray the curl with hairspray when it comes out of the iron. Now do the same with the right section.

6) You’re now done with the bottom section. Repeat step 3 to step 5 on the middle section of your hair.
  
   7) Now everything is curled except for a small section of hair on top of your head. Where the parting of my hair starts, I take a string of hair that's about 4 centimeters wide on both sides and curl those to the outside. This frames your face so pay extra attention to getting a perfect curl.

8) The rest of the top layer I curl like traditional curl rollers. I lift up the hair so the tip of the hair faces the ceiling and then roll the curling iron down to my head, rolling inwards.

9) Shake it out, lightly brush the curls so they become softer and set with hairspray again. VoilĂ !


 Two last tips:
- For a more natural look, curl some hair outwards (rolling the curling iron away from your face) and some inwards (rolling towards your face).

- For the best result clip the hot curls to your head with small (bobby) pins, hairspray that and take the pins out when the curls are cooled off.

For more, also follow me on: Bloglovin'Twitter and Fashiolista!

BEAUTY | Slick

Photobucket

Backstage at Dsquared last year's fall/winter show.

We could either not wash our hair anymore and let our roots get really really greasy or just find a strong hairspray.

BEAUTY | Pastel Hair, products

Photobucket

Photobucket

Photobucket

Photobucket
Hair dye: Directions, Lilac and Lavender
Shirt: Courtesy of The Scarletroom


The worst thing that can happen to grey hair is that after a few washes a yellow/blonde undertone starts to shine through. A shampoo with purple or blue pigments supposedly stop this from happening, but the effect of it is minimal.
I needed something more radical against the yellow glow on my hair. Temporary hair dye in a pale cool color (opposite of the yellow) was the perfect solution. Dying your hair with this pastel hair dye only takes 15 minutes. I use lilac from Directions, the pastel color changes from a light blue to a pastel fuschia in different light. But after a few washes the color fades and the hair color becomes a cold toned grey.

VIDEO | A Quick Hair Routine


Photobucket

Photobucket

Bloglovin and Aussie hairproducts are giving bloggers the opportunity to share their hair routines with the world through their website. They also asked me to contribute by showing how I style my hair. Click to see the hair tutorials of the other bloggers

I like hair to look a bit neglected.
You could say that Kate Moss, Debbie Harry and Mary Kate Olsen are my hair-idols.My hair is very thin and fragile, therefor I only wash it 3x a week. I do not mind frizzy hair at all.


*Very rude of me to have forgotten to include the music credits: Side Dish by Psapp